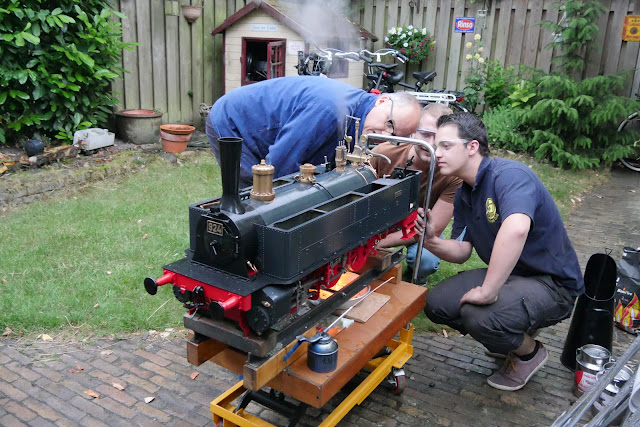
Progress has been made on the assembly of the locomotive. The tanks are mounted on the running boards and the lubricator is connected to the cylinders.
The connecting pipes for the axle driven water pump have been also made. With an extra bend, so it can avoid the front axle, it will connect the filter outlet from the tanks with the suction part of the pump.
Oil pipes were also made for the eccentric and the pump ram. The lubrication of these parts is by drip feed from a second oil tank that is mounted on the running board. A thick piece of felt is inserted in this tank, that in effect is blocking the exit to the oil pipe. This way there is a 'controlled' feed rate.
A view from the underside of the locomotive front end. The connections to the water pump are visible; and they are reachable with a wrench, without the further dismantling of other parts. I hope this way dismantling the pump for maintenance is easier than on my other locos.
I decided to use 3mm thick cork sheet for cladding the boiler. This material has a good insulation factor, is relatively cheap (I've paid
€29, -- for a roll of 5 meters ), easy to work with and can withstand moisture.
I was able to fix three layers on the boiler barrel.
Cutting was done on a piece of hardboard, with a sharp pocket knife.
With some tape the individual pieces were temporarily held in place; the brass lagging sheet will hold it in position afterwards.
On the firebox shell a recess was cut for the boiler stays with a small hollow punch.
The completed boiler.
The final assembly of the water gauges could now be done. Again I used the blue silicone sealant (
Loctite 5926) for the flanges of the gauge.
The gauge glass itself is sealed with a silicone ring, which was cut from a piece of tube with a scalpel.
The easiest way is to do this is on the lathe, when the tube is slit over a piece of brass (or wood) and the scalpel mounted in a tool holder.
A ring of 2mm height is placed on the bottom nut, a ring of 2,5mm height was used on the top halve. This was done because I had little space on the top part to cut more screw thread. Only finger pressure is used to tighten the nuts.
The holes in the bottom and top parts and the nuts are slightly larger (6,2mm) than the glass diameter (6,0mm). This will allow for the difference of expansion of the glass and brass. The glass should never touch the brass parts, otherwise the danger exists that due to tension the glass will crack once the boiler is on working temperature (approx. 160 degrees Celsius by 6 bar working pressure)
A black and white striped plate is situated behind the gauge glass. This makes it easy to see the water level in the gauge glass. Due to the difference in
refractive index the cross stripes at an angle, will appear horizontal there were there is water in the glass tube. On the photo the plates are taped on a piece of metal, so I could hold them for paint spraying.
The backhead of the boiler. The water gauges in position, with their blowdown cocks and pipes.
Extension pipes (6x4 mm copper) are screwed on the blowdown valves. They extend to the rear of the loco, just below the bufferbeam.
The boiler sitting in the frames.
Also a first concept of the drawing of the steam pump has been made.


