Welcome

Live steam model on 7¼" gauge of the Württembergische T3 no 924

Welcome to this blog. It will inform you about the progress of designing and building live steam model locomotives. The blog contains the description of a model Würrtembergische T3 on 7¼" gauge (built between 2006 and 2017), the wagons for this loco (built between 2018 and 2022)  and a 5" gauge model of a Great Eastern Railway Y14 class loco (started in 2020)

On the left you'll find the index where you can browse through the different articles and on the right you'll find all the extra's. On the top tabs you'll find a brief description of my other locos.


Click for the direct link to start of construction series below 
T3 7¼" steam locomotive 
 
Enjoy this site. Erik-Jan Stroetinga. The Netherlands. Europe.


Monday 13 July 2020

Bier-Kühlwagen Roof and brakeman cabin (3)

The roof will be hinged and can be flipped open to get to the driving tools inside the wagon. For the brakeman cabin this presents a problem. When the total roof has to be opened, the cabin would get in the way.
I therefore opted for a separate end piece, on which the brakeman cabin is fixed. The separation line is the where the extra insulation roof ends; just in font of the cabin.  

A small piece of roof was made on the same method as the roof itself.... 

...but only two cross members are used. 

To give the side some impact protection, an aluminium angle profile is glued at the sides. 

Almost all the parallel clamps in use; together with a steel strip, to keep the edge as straight as possible.
But wood and glue; there is still some deformation. 

For the brakeman cabin (Bremershaus) I bought a drawing from 
Zander Heba.  A great source for very detailed works drawings.

A full scale drawing can be obtained by Zander Heba.  


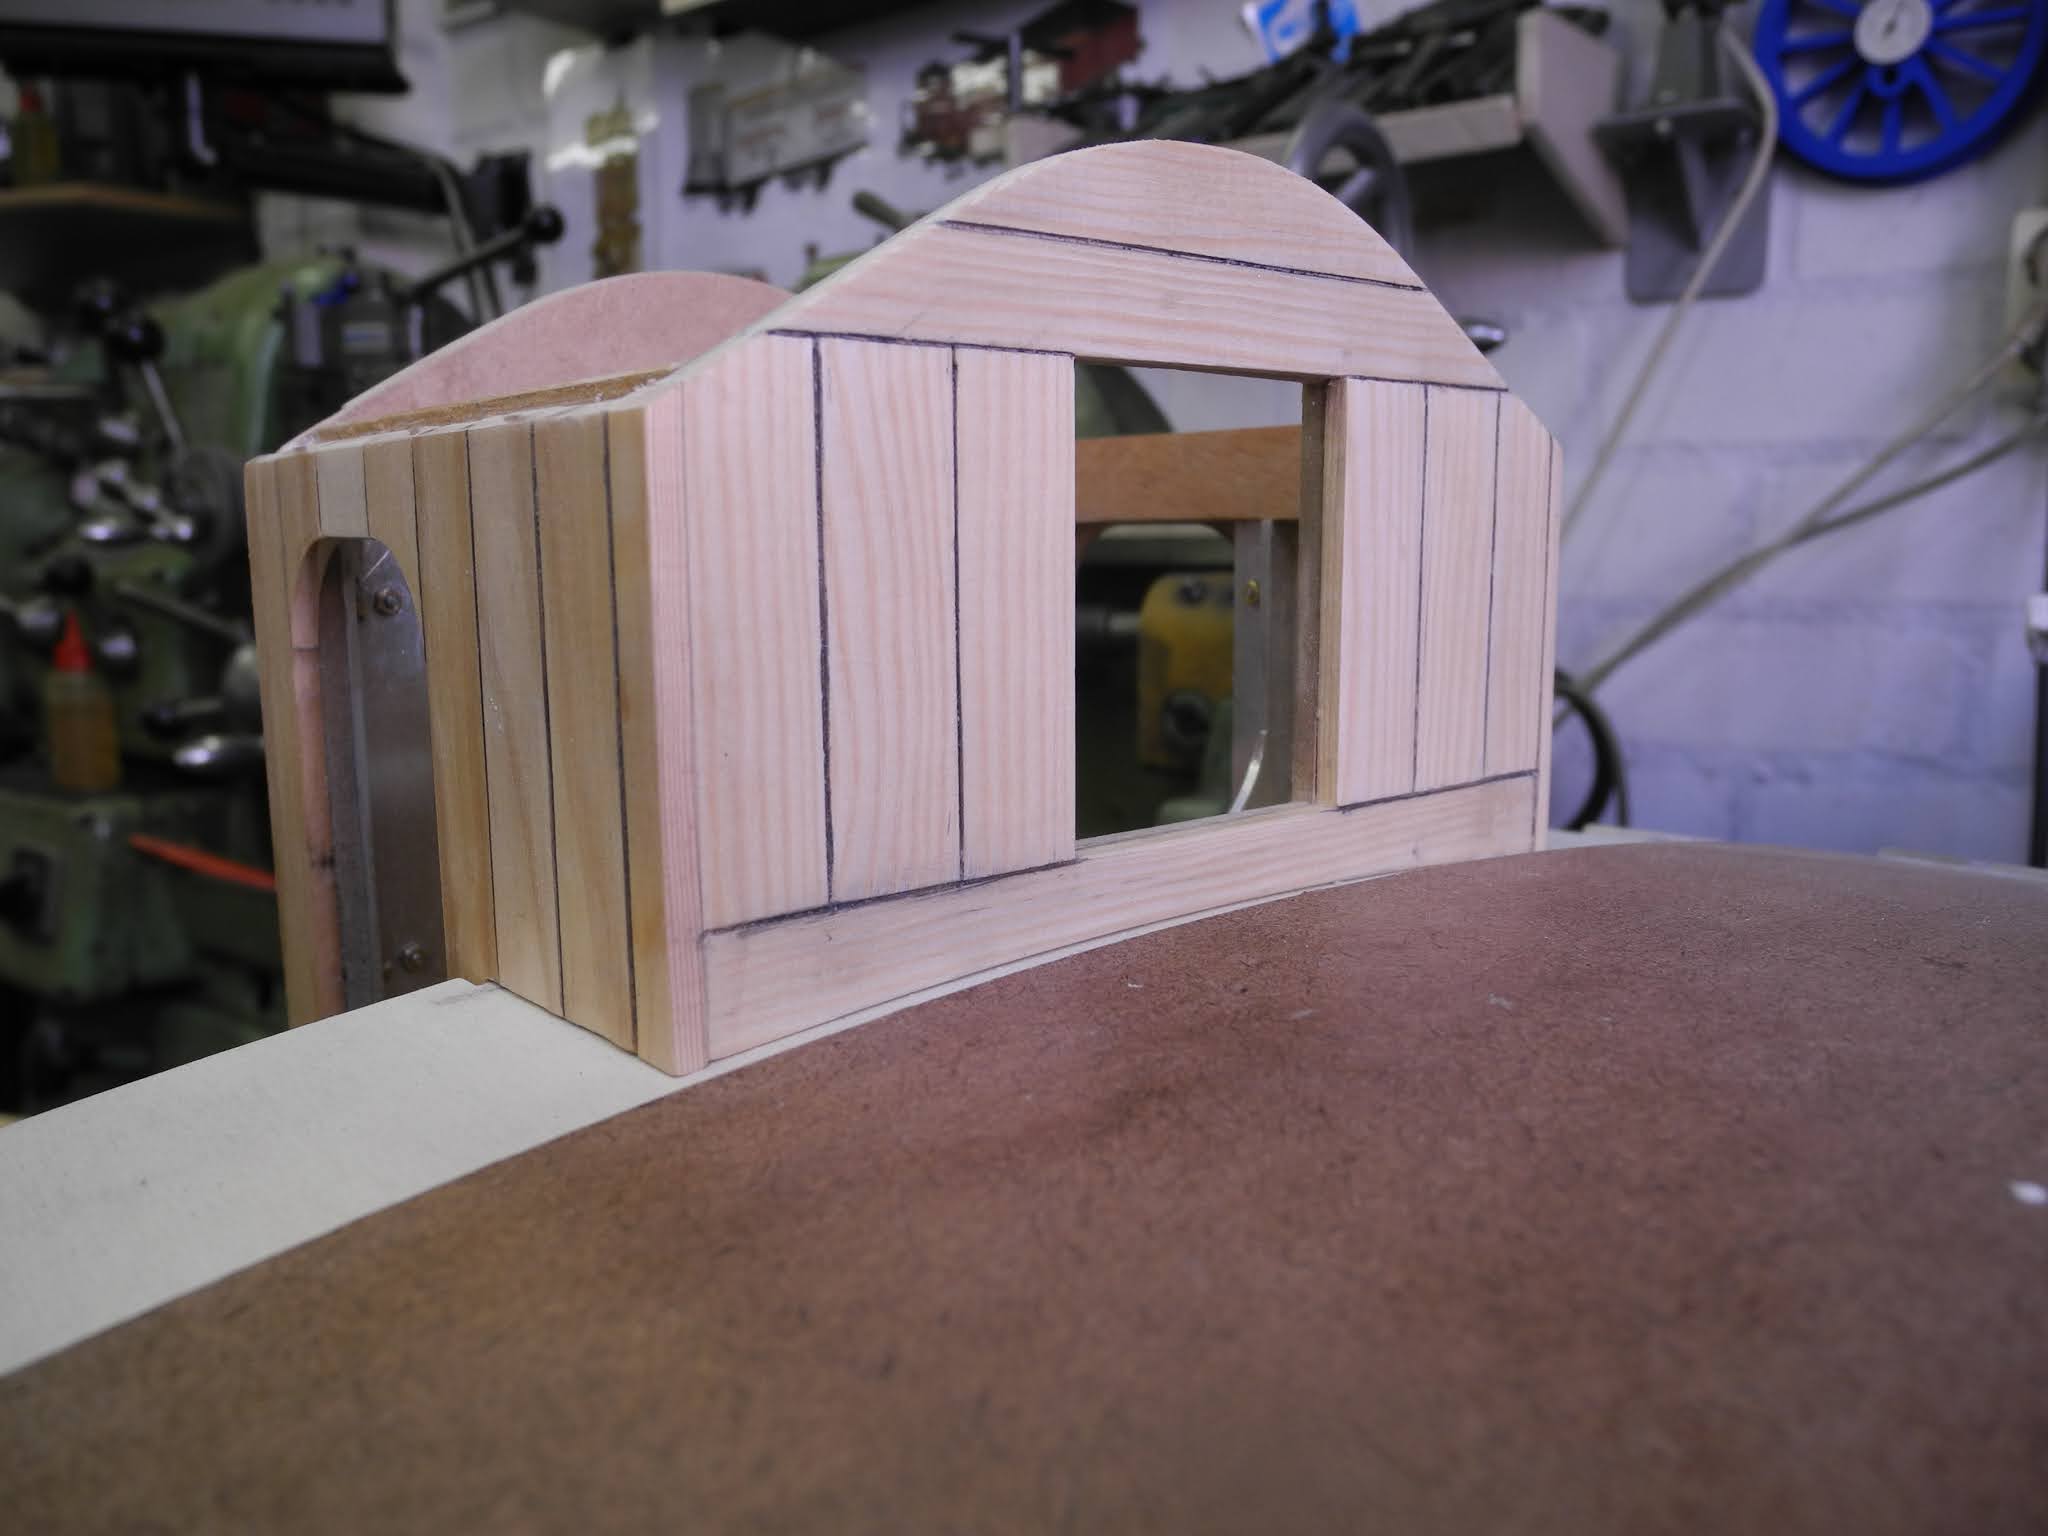
The body of the brakeman cabin is cut from 4 mm MDF plate. This was done with the jigsaw and file.

Aluminium 15 x 15 x 2 mm profile is glued and screwed, to give this 'inner' body strength. This will be cladded with individual pine planks.   

For transport and storage of the wagon, I decided to make the brakeman cabin detachable from the wagon. A clip will 'catch' the cabin. 

On the wagon it is slides in these clips, positioning and holding the cabin bottom on the wagon. 

The individual planks make it possible to get the direction of the grain of the wood right, as on the real wagon.  

The front of will be later on glued on the separate roof part. 

The complete cabin, without doors and windows of course, but already with the rounded top corners of the door. 

A test fitting on the wagon. 


Saturday 4 July 2020

Bier-Kühlwagen Woodwork (2)


The superstructure of the wagon is mainly made of wood. To be able to store the wagon, it's made removable from the frame. The wagon supersturcture, alias 'toolbox on wheels', is fixed with 8 M4 bolts that connects the cross-members to the floor.  


Essentially a wooden box on wheels 😀.  The 9 mm plywood cut to size at our local DIY store.
In Solidworks it didn't look that big.


Special insert nuts are used.   In a wooden strip these 8 nuts line up with the under carriage.


The wooden strips, with the insert nuts, glued and screwed  to the floor plate. It is held in position with notches that 'grip' the horn plates on the frame. The bolts ties it down.   

The sides of the wagon are cut to size.

The radius of the roof is CNC milled to size. 

The same method for making the grooves as used when making the Omk wagon. This way  the individual planks are resembled. These planks however are much smaller then on the Omk open wagon. 

This refrigerator van (Kühlwagen) has a smooth outside cladding. 
The steel frame (on the original wagon) was sandwiched between the outer cladding and the inside wall.

Because of the smaller planks, it takes up more time to cut all the grooves. 

The first assembly. The side walls are only glued to the floor. Because the side walls extend under the floor, a 3 mm rebate was cut; too small for using screws. 

A cross sectional view, showing the construction. 


A first view of the wagon. The H0 Märklin wagon is standing in the door opening. 


A test drive at the track of the SMMB in Tilburg. 

For the roof, curved roofbeams are milled. A strip of 10 mm aluminium is used as a fixture. With four bolts the wood is clamped and can be milled on the full circumference in one operation. 

A 4 mm soft plywood plate is used as the base of the roof. This material can be bend without to much difficulty.
In one batch I could glue 5 roofbeams in a row; then all my clamps were at use.

A steel tube is used as a "building keel" to keep it reasonable straight during gluing.  
The first longitudinal member is put in. 

On top of (or rather on the bottom, once the roof is on the wagon) the longitudinal members, crossbeams are glued. These a pine strips that have their fibres in the length of the strip; and therefore are able to take up the tensile strength caused by the weight of a passenger sitting on the roof. 
 I've tested one crossbeam and it was able to take a weight of 40 kilograms, before any deflection was noted. 

It looks a bit like ship building. I've once build a model boat, were this technique is used. 

A meranti strip, on which the roof will rest.  

To create more thickness and to model the double roof, a 3 mm hardboard is added.
This is cut in parts of 150 mm wide. To glue such a large plate in one operation would be difficult and now it resembles the separate bands of roofing, as used on the original wagon.

Some weight is needed to press it down during gluing. 

The roof taking shape 


The roof will be hinged. Other model engineers told me that this is the best way to avoid damage to the roof. If it was detachable, it would put against a wall, or put on the floor and this way the corners would get damaged more quickly.