Welcome

Live steam model on 7¼" gauge of the Württembergische T3 no 924

Welcome to this blog. It will inform you about the progress of designing and building live steam model locomotives. The blog contains the description of a model Würrtembergische T3 on 7¼" gauge (built between 2006 and 2017), the wagons for this loco (built between 2018 and 2022)  and a 5" gauge model of a Great Eastern Railway Y14 class loco (started in 2020)

On the left you'll find the index where you can browse through the different articles and on the right you'll find all the extra's. On the top tabs you'll find a brief description of my other locos.


Click for the direct link to start of construction series below 
T3 7¼" steam locomotive 
 
Enjoy this site. Erik-Jan Stroetinga. The Netherlands. Europe.


Monday 20 April 2020

Güterwagen Omk (part 12) handbrake and final details


Seat

A nice detail to make is the foldable seat inside the brakeman's cabin. This seat has a backrest that will fold up together with the seat. On the original drawings this is quite clearly drawn and is ingenious and at the same time a simple system. 
Of course the seat has to be folded upward if the brakeman is entering the wagon from the right entrance. Otherwise the seat would be in the way to reach the brake handle. Although there is a seat, I think it was not very comfortable to sit there. 


On a steel frame oak planks are screwed. The frame has the lugs for the folding mechanism. 


In the upright position, the seat and backrest are sitting against the headboard.


A small stop on the other side of the cabin will hold the seat in the horizontal position. 


In the folded down position it is clearly to see how the seat is blocking the entrance. Although it was nice to make, it won't be directly visible in the completed wagon.


Handbrake (parking brake)


As an extra this fork was made. This way the handbrake for the full scale engine driver can also be used as a parking brake. The part was milled and the radius is filed with filing buttons. 


The fork is attached to the main shaft that operates the brake. It serves at the same time as an end limit for the movement of the brake handle that will be operated by the driver.


A tribute to Märklin. Their models got me into trains and model engineering in the first place.


Although in Solidworks the layout of this handbrake assembly could be designed, I worked in this case directly from the works drawings. Afterwards I've made the Solidworks drawing, to keep the drawing of my wagon up to date.  
  

The brake spindle is attached to the back of the brakeman's cabin.


From solid brass the nut is milled and turned. 


A separate nut is also made. The precise function I'm still not aware of. It is on the original drawing and looks like it has to act as a limiter to the end of the stroke of the spindle.


The complete brake spindle on its own subframe. 


 To determine the exact position on the wagon, the bufferbeam is removed and clamped to the brakeman's cabin.  


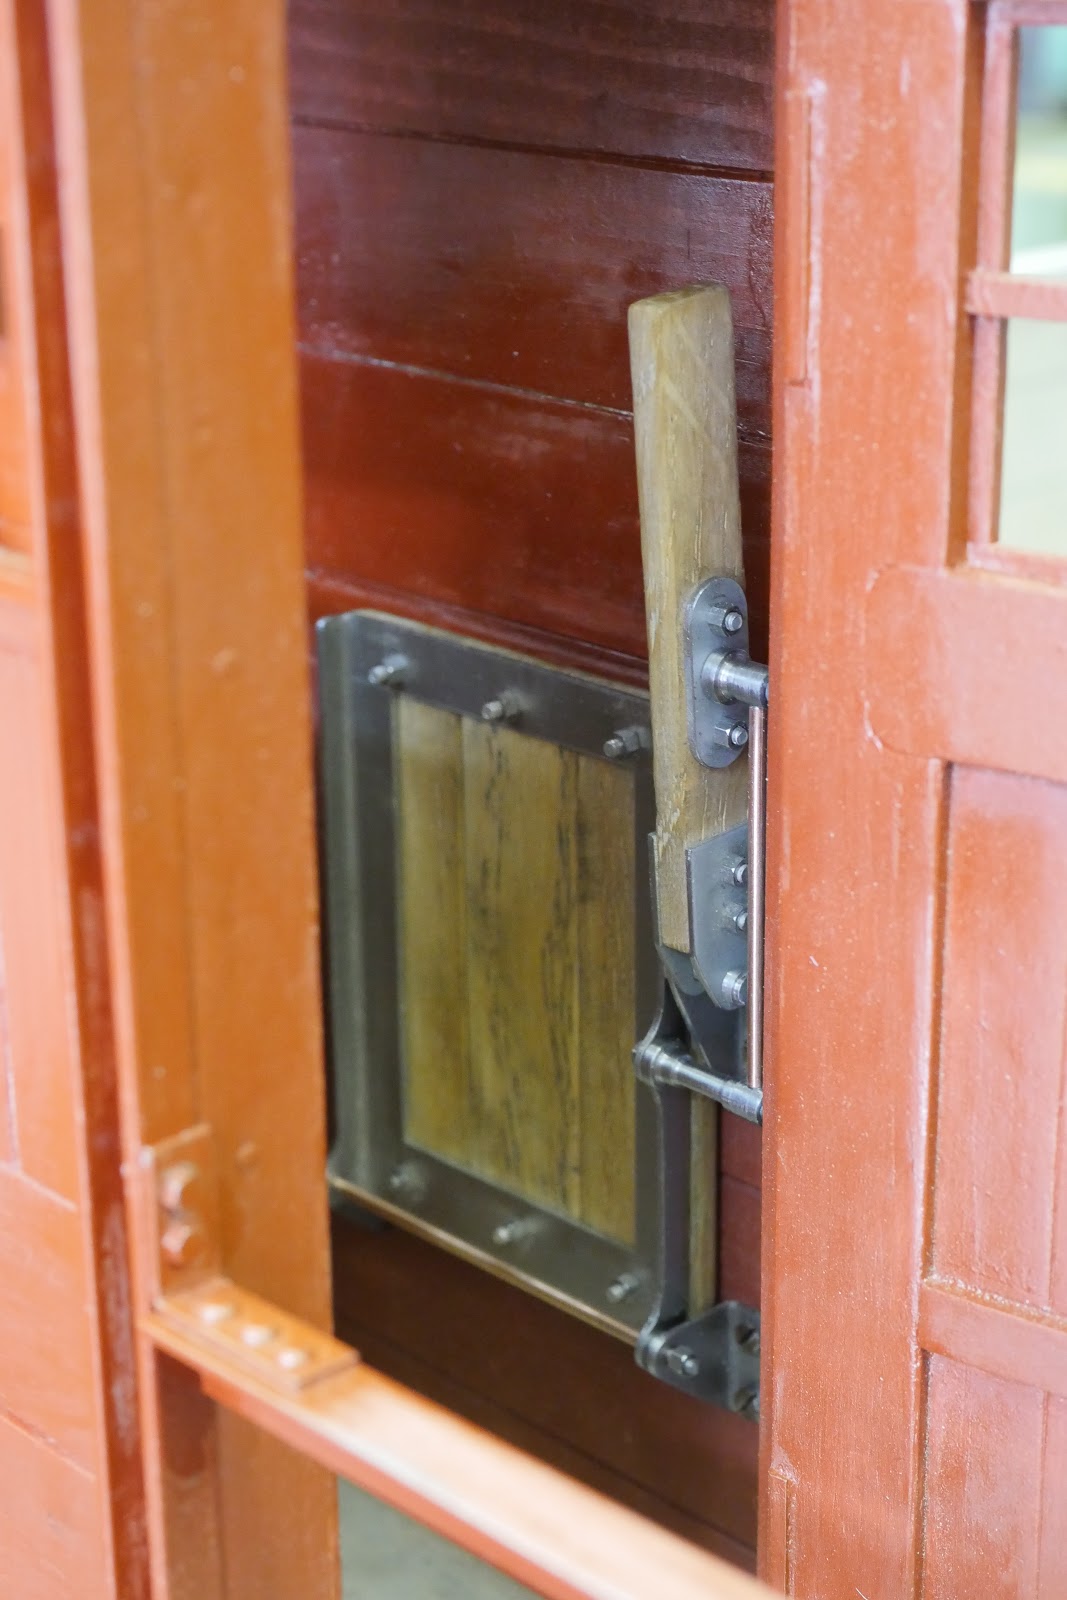
These levers connect the brake spindle to the brake gear. 


The complete assembly. 


The hand lever inside the brakeman's cabin. 


Doorstops 

These little items act as an end stop for the side doors.  


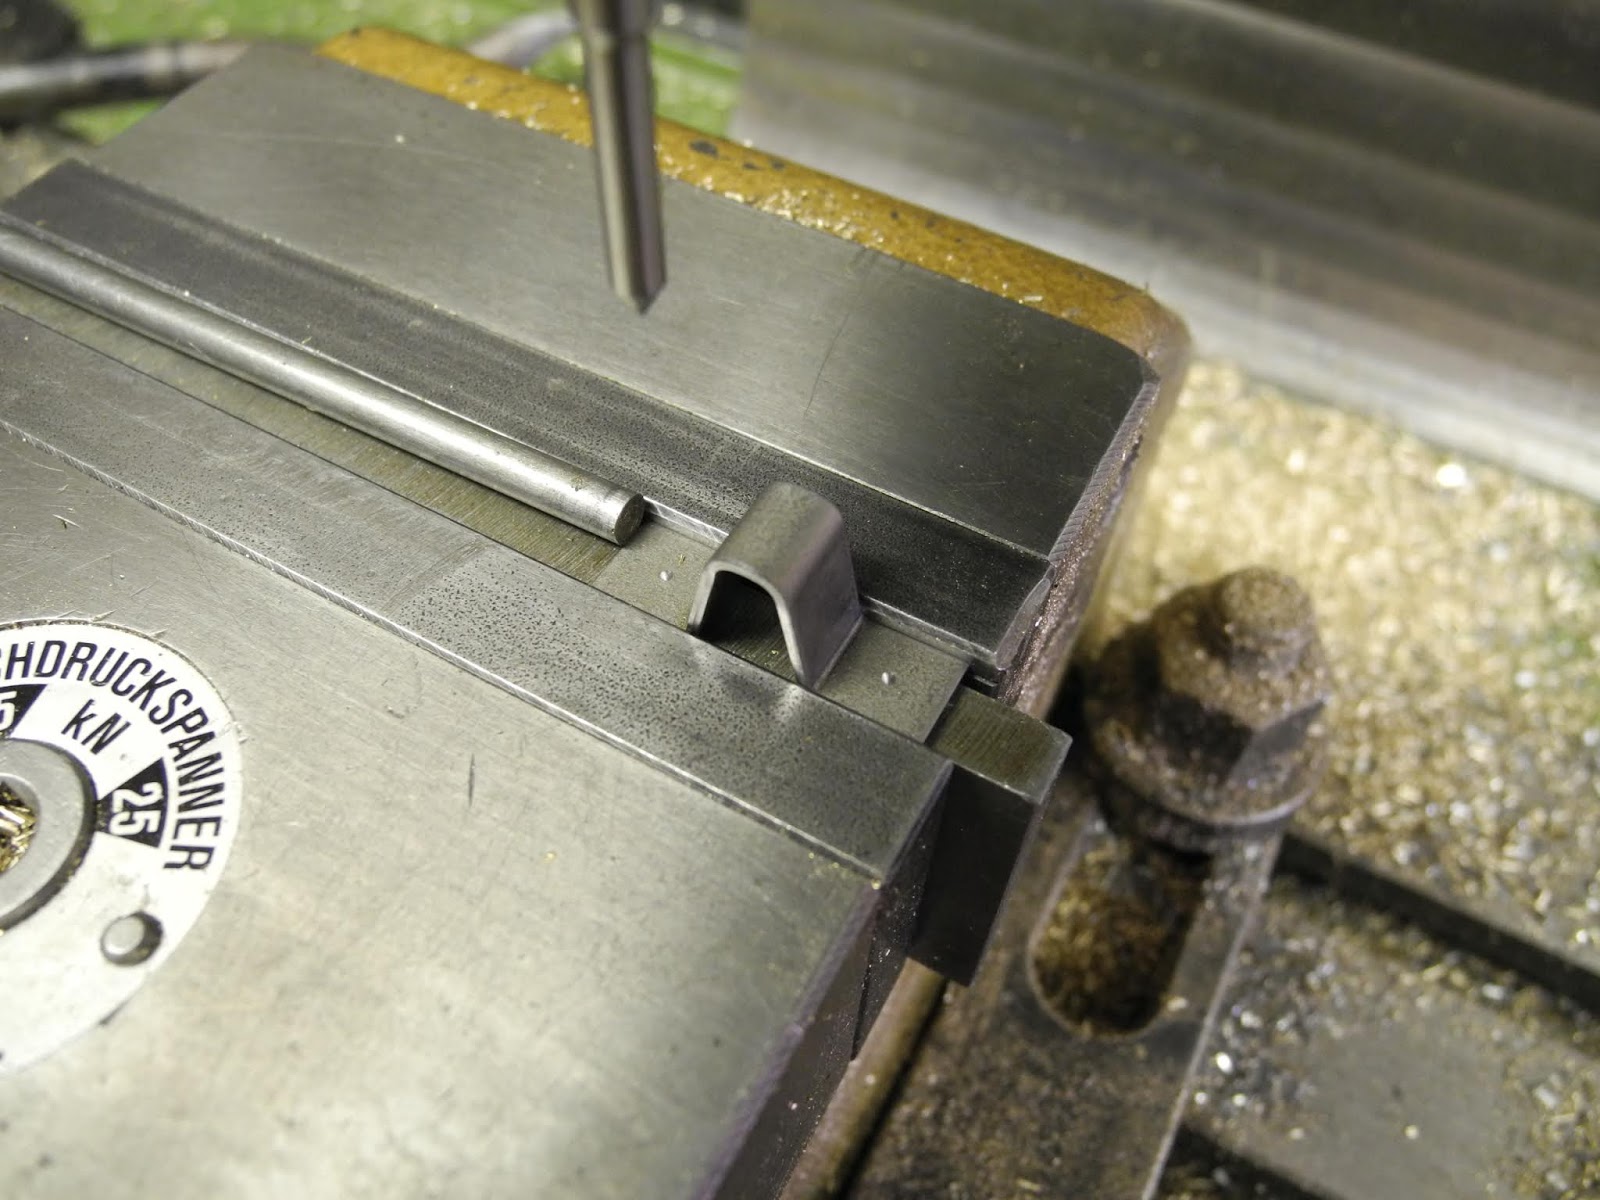
To bend these stops, a small bending punch was milled from brass. 


Operated in the vice of the milling machine, the strips were quickly bend into shape.


These items are too small to bend in this shape on my bending machine. 
  

A set-up on the milling machine, the positions for the holes were centered. 


Holding them in place with small clamps, prior for drilling.


The stop, preventing the doors slapping against the side boards.


The door catch below the door was made in a similar way. 


The complete wagon 


A few of the models I've used to make this open goods wagon / driving truck. 
Ranging from gauge N, H0 and gauge 0.
The book of Güterwagen Band 3, shows that the model firms do not always work exact to scale and not all wagons that are available on the market are correct. 
So if you find any mistakes or omissions in my wagon I'm in line with the great names as Märklin, Fleischmann, etc. 😀


Box

For the driver (this wagon will be the driving truck for my steam loco) a seat is also needed.
This wooden box doubles as a seat and storage box. 


It is a simple wooden box, made of 9mm multiplex and it is cladded with 4 x18 mm pine wood slats.


Some kind of logo of manufacturer will be put on the sides, so it will have the appearance of  a real wagon load.


Next step is painting and lettering the wagon. 


Thursday 2 April 2020

Güterwagen Omk (part 11) detailing

As these Corona times demand we have to work at home, it means that I can work more efficient and therefore my normal day time job (teaching) is finished at 17:30h. And there is nothing to do outside (everything is closed and all events are cancelled). So the evenings and weekends are now really free, and thus there is time for model engineering.

The final details of the wagon have now my attention. The rear and front steps, handrails, cable rings, bufferbeam grips etc.


The rear steps were the first to be made. These are supported by 3 x 8 mm bars and the steps are made of 4 mm beech wood. A metal plate below the wood makes them hopefully more resistant to impact. (Used on ground level track they can be kicked by a steel capped safety shoe or during loading/unloading in the car).


The corner profiles are removed, so the handrails can be attached. 


On the top of the profile a catch plate is riveted. This plate will lock the side boards in place. As explained earlier on  previous blogs; on the real wagon the side boards were removable. 


For the bending machine I've made a small mandrel for bending rings. 


To test this method I used a piece of scrap metal that fitted nicely in the machine (35mm).
It worked and I made a set of rings.


Soldering to the brass eyes. 


I drilled holes in the lower steel bar and fixed some rings. They appeared a bit on the large side; measuring for a Märklin wagon and scaling them up to 7¼" is not always correct. 


Checking with photographs in the book "Güterwagen band 3 Offene Wagen", by Stefan Carstens, I decided to make some smaller rings.  


They look more to size (although in the book you'll find pictures of wagons that have even a mix of small and bigger rings)  


The grips below the buffers (not seen on British wagons, but widely on the continent) were bend in the bending machine and vice. A piece of scrap metal was used as depth gauge.  


The front bufferbeam with rings and grips.


Not CNC, but with file and hacksaw, the support of the front step was cut to shape. 


The complete support for the front step.


Again a wooden step with a steel support plate. As on the real wagon, the support plate has bended edges, to prevent that the shunter can slip of the step.


Even on the front end door a handrail is provided for the shunter. 


On the rear the handrail are also fixed. These rails are bended from 2,5mm welding rod. 


Bending 4mm steel rod. 


These little triangle eyes are fixed on the front as well. Why they are there is not explained in the book of these wagons, but Kristian (a member of the German live steam forum) kindly explained me their purpose. On small goods yards there was not always a shunting loco available and with a winch they could move the wagon to the loading ramp. 


The door handles are simple devices, but they lock the doors nicely. 


View from the inside. A wooden catch block holds the handle in position.