Welcome

Live steam models on 7¼" gauge of the Württembergische T3 and on 5"gauge Great Eastern Railway Y14 class

Welcome to this blog. It will inform you about the progress of designing and building live steam model locomotives. The blog contains the description of a model Würrtembergische T3 on 7¼" gauge (constructed between 2006 and 2017), the wagons for this loco (built between 2018 and 2022), and the current project a 5" gauge model of a Great Eastern Railway Y14 class loco (started in 2020)

On the left you'll find the index where you can browse the different articles and on the right you'll find all the extras.  You'll find a brief description of my other locos on the top tabs.
 

Click for the direct link to start of construction series below 
T3 7¼" steam locomotive 
 
Enjoy this site. Erik-Jan Stroetinga. The Netherlands. Europe.

Tuesday, 26 May 2020

Güterwagen Omk (part 15) lamp irons and end signals


This is the final part of this Omk wagon. After almost two years, the wagon/driving truck is now ready.

 Omk is a telegraph code given to these wagons. Different to the British system of the Great Western Railway is that it is not just a name. The letters Omk show in detail what type of wagon it is.  
O stands for: Offene Güterwagen mit 15 t Tragfäghigkeit (open wagon with a loading capacity of 15 metric tons).
m stands for:  Mittelbord (middle size height of the side boards)
k stands for:  Kopfwand drehbar zum abstürzen der Ladung (end of the wagon has an movable flap, so the wagon can be tipped over for unloading) 

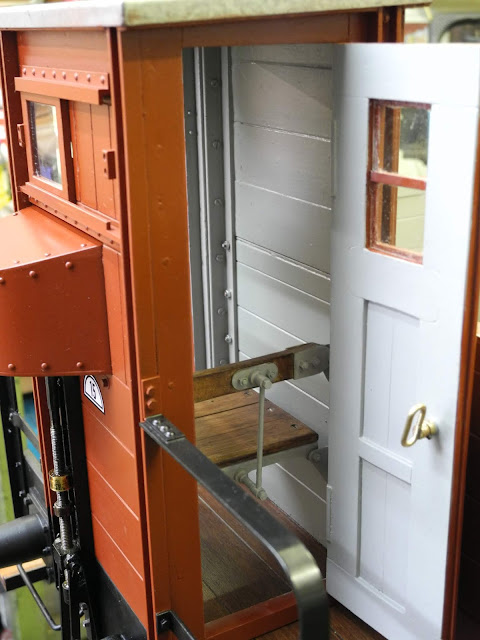
In the book of German railway wagons there is a lot of information  about the colours;  Anstrich und Bezeichnung von Güter- und Dienstwagen by Wolfgang Diener  (Painting and lettering of wagons). There is also a photo that shows that the inside of the brakeman's cabin is grey. So this was done by using a brush.  


The seat box is provided with rubber strips glued on the bottom. This makes sure that it will stay in place during the ride. 

Lamp irons

The last thing to be made are the lamp irons and end signals.  This German design consists of a conical square, in which an oil lamp or signal can be placed.

This conical square is formed with a homemade mandrel. Copper pipe is deductible enough to form

The mandrell (below in this picture) is milled to shape, with the aid of a dividing head in the milling machine. The copper pipe is 8 mm square (top) and about 9 mm high. The wall thickness is only 1 mm. 

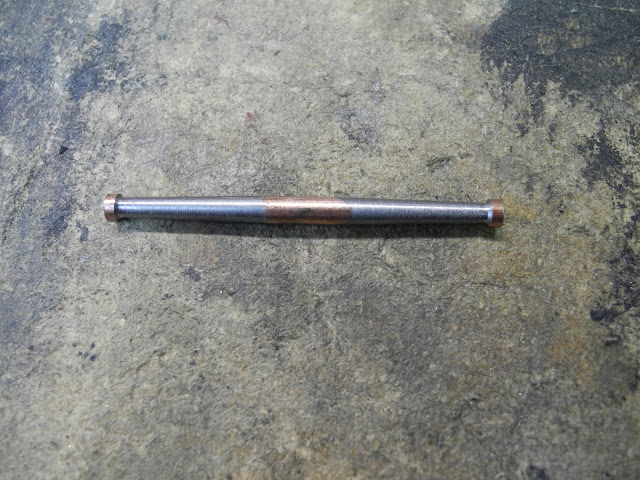
From 5 mm steel the post is turned...

... and bended about 95 degrees. With a file the end is shaped, so it will fit the copper square.

A simple, but effective set-up for silver soldering the post to the square. It's aligned on eye sight.   


The two lamp irons were soldered as one piece, and cut in two afterwards. This way of doing it has the advantage that the part is of a reasonable length, so I can check the alignment easier.  


On the other end a piece of strip is soldered on, again a larger strip helps to see if everything is aligned.  Here the mandrel will help to adjust the alignment before soldering. 

The very last bit of alignment (making sure it is vertical in both sides) can be done, once it is screwed to the wagon.  

In the back, a full size end signal from the Deutsche Bundesbahn. 

Painting the lamp iron with a small airbrush. 

The signal plate is filed of 1,5 mm steel plate. A bit of garden wire is rolled to get it straight...

.. and bended into shape. This will be the handgrip.

On the real signal plate 'DB' is stamped, so I thought that a 'W ' (Württemberg) would be appropriate. 
The vice of the milling machine is put to use as a press. This way all the W's look the same. 


In Solidworks the drawing is now also completed. 


This is necessary, so a DXF file can saved, to be used for the cutting plotter. 

With a white background and red triangle it looks like the real thing. 
There is a nice website about these end signals and lamps.  (don't forget to scroll on that website down for the history and some beautiful pictures). 

The signal plate in the lamp iron. Miniature oil lamps are also on the wish list to be made. 


Still during the Corona lockdown: in the living room a first look at the wagon behind the loco. 
So a test on the track is still something for the future. 


Cleaning the wagon, after a few years of use. (16 Oktober 2023). It collected dirt like a real railway wagon. 


Meanwhile the next project is already on the drawing board (or better put: on the computer in Solidworks).  This will be the wagon for all the things needed on a day at the track. 


Sunday, 10 May 2020

Güterwagen Omk (part 14) final painting and assembly

Almost finished. But as always the last jobs still take a lot of time.
The final painting jobs before the assembly can be undertaken. 

A black part is painted on the bottom two planks in the left lower corner. 

The lines are 2 mm wide.

This black part is used to stick on destination papers of the wagonload (left box).
With chalk track numbers are written on the right; this shows the shunter were the wagon should be positioned for building up the train. 

The floor is painted to resemble the individual planks.
On the real wagons the floor was only treated with hot linseed oil.

The inside is painted gray. In this case I've used a brush. I bought a brand new one: a sable hair brush. Expensive, but what a difference in painting. It's very smooth and brings on an even coat of paint. 

Also the inside of the brakeman's cabin is painted gray.

The assembly of the frame starts with the sole bars. The frame extensions clip in to the end of the T-profiles. 

The subframe for the brake gear is assembled on the workbench first. 

An overview of the frame, with the major components installed. 

With the wheels in place, an overall third coat of varnish is sprayed.
Fortunately the weather is good, so I can spray outside. 


My son, who 3D-printed the Märklin logo, requested that it was painted in a different colour, so it stands out nicely. 


Buffer heads and coupling hooks are blackened by heating them with a flame and dipping them in oil.  This leaves a nice black coat on the metal.
After greasing and oiling all movable parts of the frame and brake gear, the wagon is on its wheels again. 


The door hinges and locking mechanism are greased as well, for smooth operation.


According to the painting instructions of the real wagon, all the parts that are gripped by personnel, should be painted black. This is done with a small brush.

So the wagon is almost finished; a few parts like the lamp irons, coupling and windows are still to be made. 


Saturday, 2 May 2020

Güterwagen Omk (part 13) painting and lettering

 Painting

The first step consists of disassembling the wagon. In the two years of building this wagon, there are a lot of parts. There are no markings on the parts, but some will only fit in a certain position and all the others parts are interchangeable. So figuring out where which part should be mounted during the final assembly is possible. 


All parts are degreased with thinner, paper towels and compressed air. 

A red oxide steel 1k primer is applied by brush to all backsides of parts that come in contact with others, once assembled. (So if water should get trapped between the parts, there is a protective coat of paint). 


The inside parts that are glued are also given a protective coat of paint. 

The underside has three coats of black gloss paint. Between each layer, the paint is rubbed down with sandpaper, to get a reasonable smooth surface. This way, I hope, the underside is easier to clean, after a days running on the track.

All the metal parts are screwed to the body and given a coat of primer as well, so that I'm sure that all corners are covered.

Masking cardboard is applied, so the third coat of paint could be applied with a small airbrush. 
(only to find out that I could have used the airbrush earlier in the process of painting; it works quicker, is easier to clean and.....no brush hairs in the paint 😑)


On photos in the book of "Painting German goods wagons", I noticed that the inside of the brakeman's cabin is gray. 


The small parts of the brake rigging were hooked up in a chain, with a weight at the end.
This works quicker during the paint spraying, than spraying each part individual. The weight prevents the small parts to be blown away from the paint spray gun.

The leaf springs in a coat of primer. Between the blades there is still the Dinitrol ML, anti rust coating 

The subframes are sprayed as one assembly.

Health and safety during painting; also a good protection against Corona-Covid19 virus I think 😊.


The bearing blocks had to be sprayed in two sessions.

The mainframes are also sprayed in two sessions; so every odd corner could be reached with the spray gun. After the primer coat, all these parts were coated with a semi gloss (satin) 1k alkyd paint, from a DIY store. This because it works fine on a wagon and............the 2K paint I still have left from painting my T3 loco in 2017 is still ok; but not the hardener. This has turned solid and can not be used😕.


Lettering

Lettering on German wagons is a science in its own way. Although there is a standard, every region has its own exceptions to the general rules laid down by the "Eisenbahn Verwaltung".  But fortunately there are good books and websites available that provide a lot of very detailed information. 
Everything is laid down in rules, drawings and guidelines. From letter font, letter size and position on the wagon, and which information should be on the wagon. These rules differ also according the period of time in which the wagon was in service and by which federal state.  


The font I had to use (pre WWI and in operation of the Württembergische Staatseisenbahn) is 
TGL 0-1451 Engschrift. All the lettering was drawn in Solidworks and saved as DXF, so it could be imported into the Silhouette Software. 

I've finally come to use our Silhouette plotter
I bought this cutting plotter together with my son Martin and our friend Joris, to share the costs, back in 2017 at a model engineering exhibition in Dortmund . They already have made some beautiful 5" wagons, with lovely lettering; I'm totaly new to this.

The Silhouette Portrait is a simple desktop cutter that is easy to set-up and operate.

The software is quite self explaining, and I got some support from Martin and Joris. 

After cutting the vinyl foil it has to be transferred to a carrier, that can be applied to the part were the letters have to go.  

This a a painstaking business. Not only have the letters to be in the correct position, but they also have to be straight and correctly spaced. 

The original foil is very thin (0.06mm), but it would not stick to the semi matt woodwork. So I decided to use a slightly thicker foil (0.1mm), that has a little stronger adhesive on the back side. But that posed the problem that the original transfer foil was not strong enough to lift the letters from their backing paper, once cut. So I've used painting tape. It works, but each individual letter has to be hold down on the woodwork, while peeling of the tape. 

A bit cumbersome, but an acceptable result. Especially if you look from a distance....

 In close-up you'll see that the letters are not perfectly straight cut. Due to the thicker foil, the cutting knife will not rotate as quick.
These 4 mm letters were to small to be applied by transfer tape. They would not stick enough to the background (woodwork). So they were put on individually, letter by letter. 

 Working so close to the work, I sometimes had to ask my wife to check if the words and letters were still straight. 

Not only on the body work there is lettering, but also on the frames. This makes  identifying the wagon possible, even when the side boards were removed.  (Deutsche gründlichkeit; German precision)


 A special sticker was needed for the tonnage symbol. This special shaped symbol indicates that the maximum load for this wagon is 15 metric tons. This way, even from a distance it was visible which category of wagon load could be loaded. (different tonnages had different shapes).

This is a black logo on an white background. Therefore I've cut two separate parts. A white background and a black foreground.


This is the thin black foil, attached to transparent transfer tape. In this case the black foil sticks perfectly to the transfer tape, and it is possible to get the two cuttings perfectly matched. 


After almost three days the last letters on the wagon.

A transparent coat of varnish is sprayed over the body,
to protect the lettering and sealing them to the paintwork.
(The gauge 1 Märklin model is another guide line for lettering)


All the lettering in Solidworks.