Design and construction of wagons, passenger trucks for our model engineering society and now the new Y14 locomotive are one part of the hobby. But maintenance for the models I've built earlier is also part of the hobby. Sometimes necessary immediately, but a planned 'general overhaul' is also possible.
My 3½" gauge (scale 1:16) locomotive 'Mona' , built 'to the words and music' of LBSC, was my first 'large' passenger hauling live steam locomotive, that I've built. Started in 1982 and completed in 1989, this loco has run many kilometers on different club tracks and many people, including my son, have learned to drive a model steam locomotive with this engine. As with everything, it needs regular maintenance and was in the workshop several times over the years.
But the last time on the track, in June 2022, I noticed that a general overhaul was needed. The locomotive ran not smooth, the connecting rods rattled a lot and the valve gear could hardly be operated. The lubricator was not working as it should and therefore the power was lacking, even with a nice fire and plenty of steam.
So in September 2022, it came into the workshop for a complete dismantling and rework of the mechanics, motion, valve gear, cylinders and more.
Now, in March 2024 it finally left the workshop, this because the work was done whenever there was time and space available.
The photos show the work done, and while the loco is now mechanically overhauled, a proper repaint is not yet done.
After building some gauge 0 and 1 live steam locos, the next step was a real coal-fired locomotive that you could drive yourself. So back in 1982, a club member suggested the Mona, a simple beginner model, of which a booklet was available.
Curly Lawrence designed this loco and
described in detail, with his famous 'words and music' how to build it.
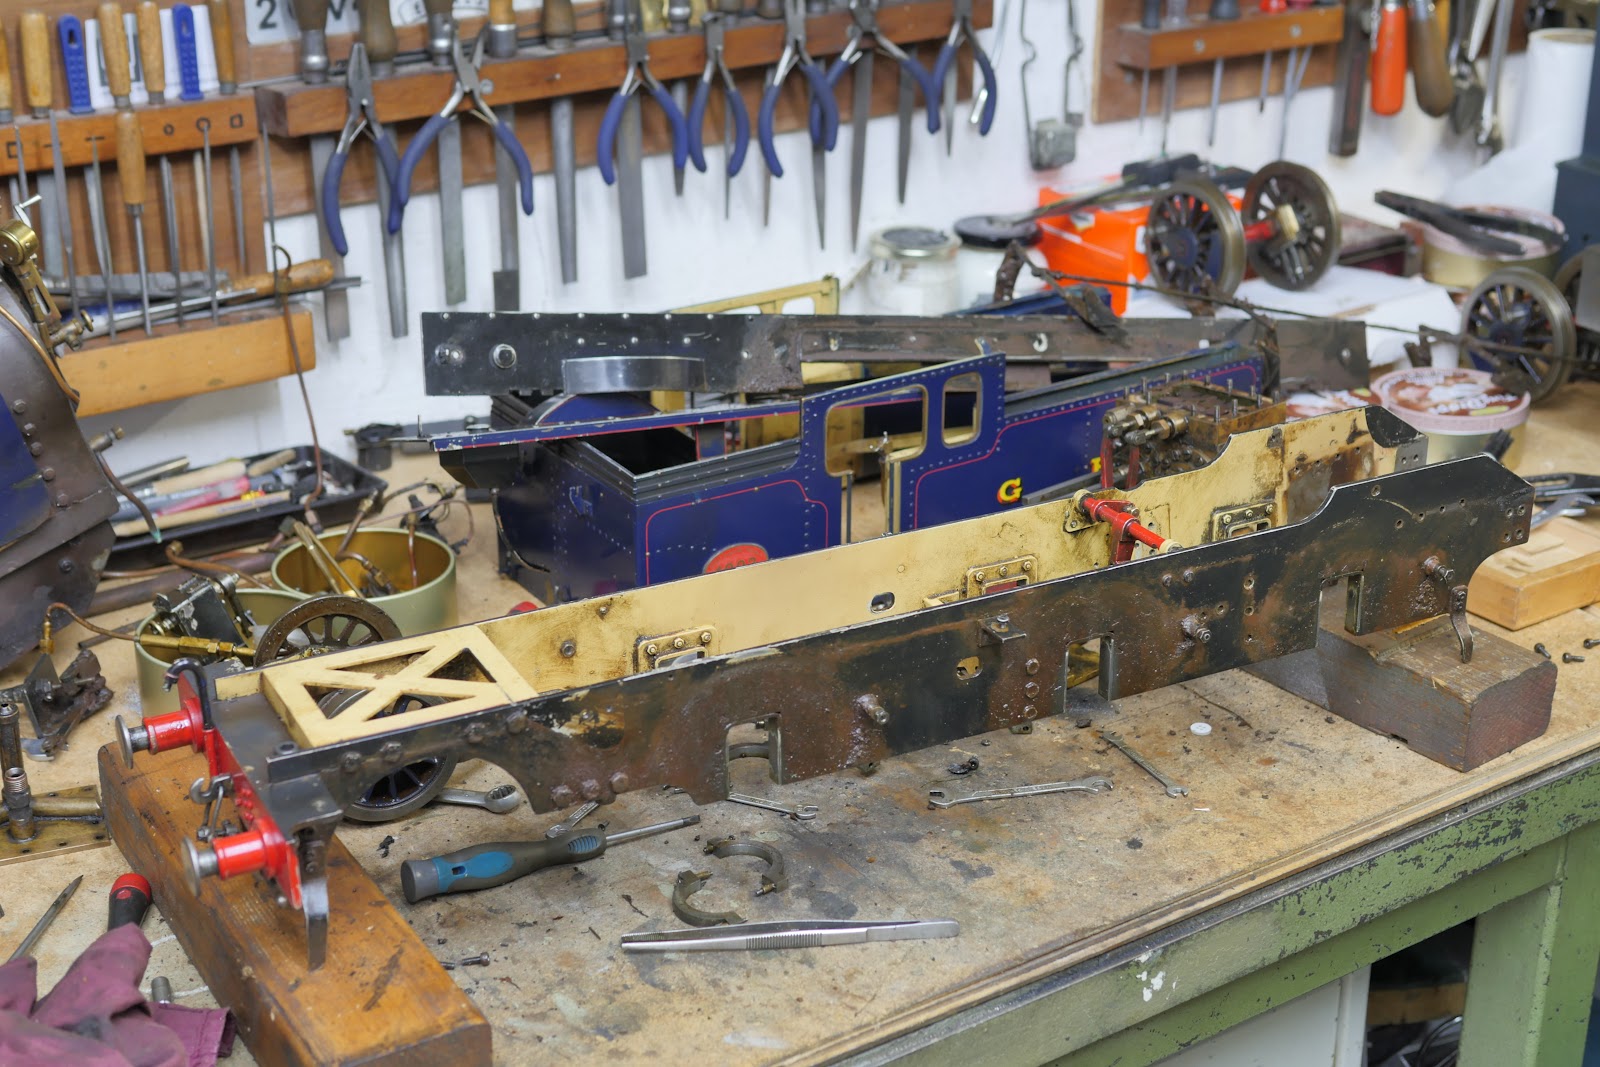
This is as the loco came into the workshop, in September 2022 ready for dismantling.
The roof and cabin front were removed, and boiler connections were disconnected.
The boiler is lifted out. This still working as it should, only a good cleaning was needed.
Even live steam models have a hard life and look like the real thing after years on the track.
After 35 years of operation. Behind wheels and brake gear a collection of grease, dirt and rust. A lot of scrubbing was needed.

The crank axle will be replaced altogether. The big end is worn down to 11.45 mm. It used to be 12 mm diameter. The excenters are also worn. During its lifetime a glued wheel came loose and the silver soldered crank broke. It underwent several repairs, but now a new one has been made.
A lot of cleaning to be done.
Scored cylinders, due to lack of oil.
Re-honing the bores.
Portface collected a crust of hardened oil and surface rust.
Replaned in the shaper. 0.3 mm was removed.
First reworked parts are ready for reassembling.
Loctite for sealing and glueing. Green; extra strong heat resistant for the steam ports, red for sealant (so the M3 studs can still be removed afterwards)
Reworked valves and portface
Cutting the crank axle to remove the wheels
Pressing out one end of the axle
Rebushing the rocker bearings
Reboring the excenter straps (+ 0.5 mm), so they are round again.
New cast iron excenters.
CNC milling the new crank webs.
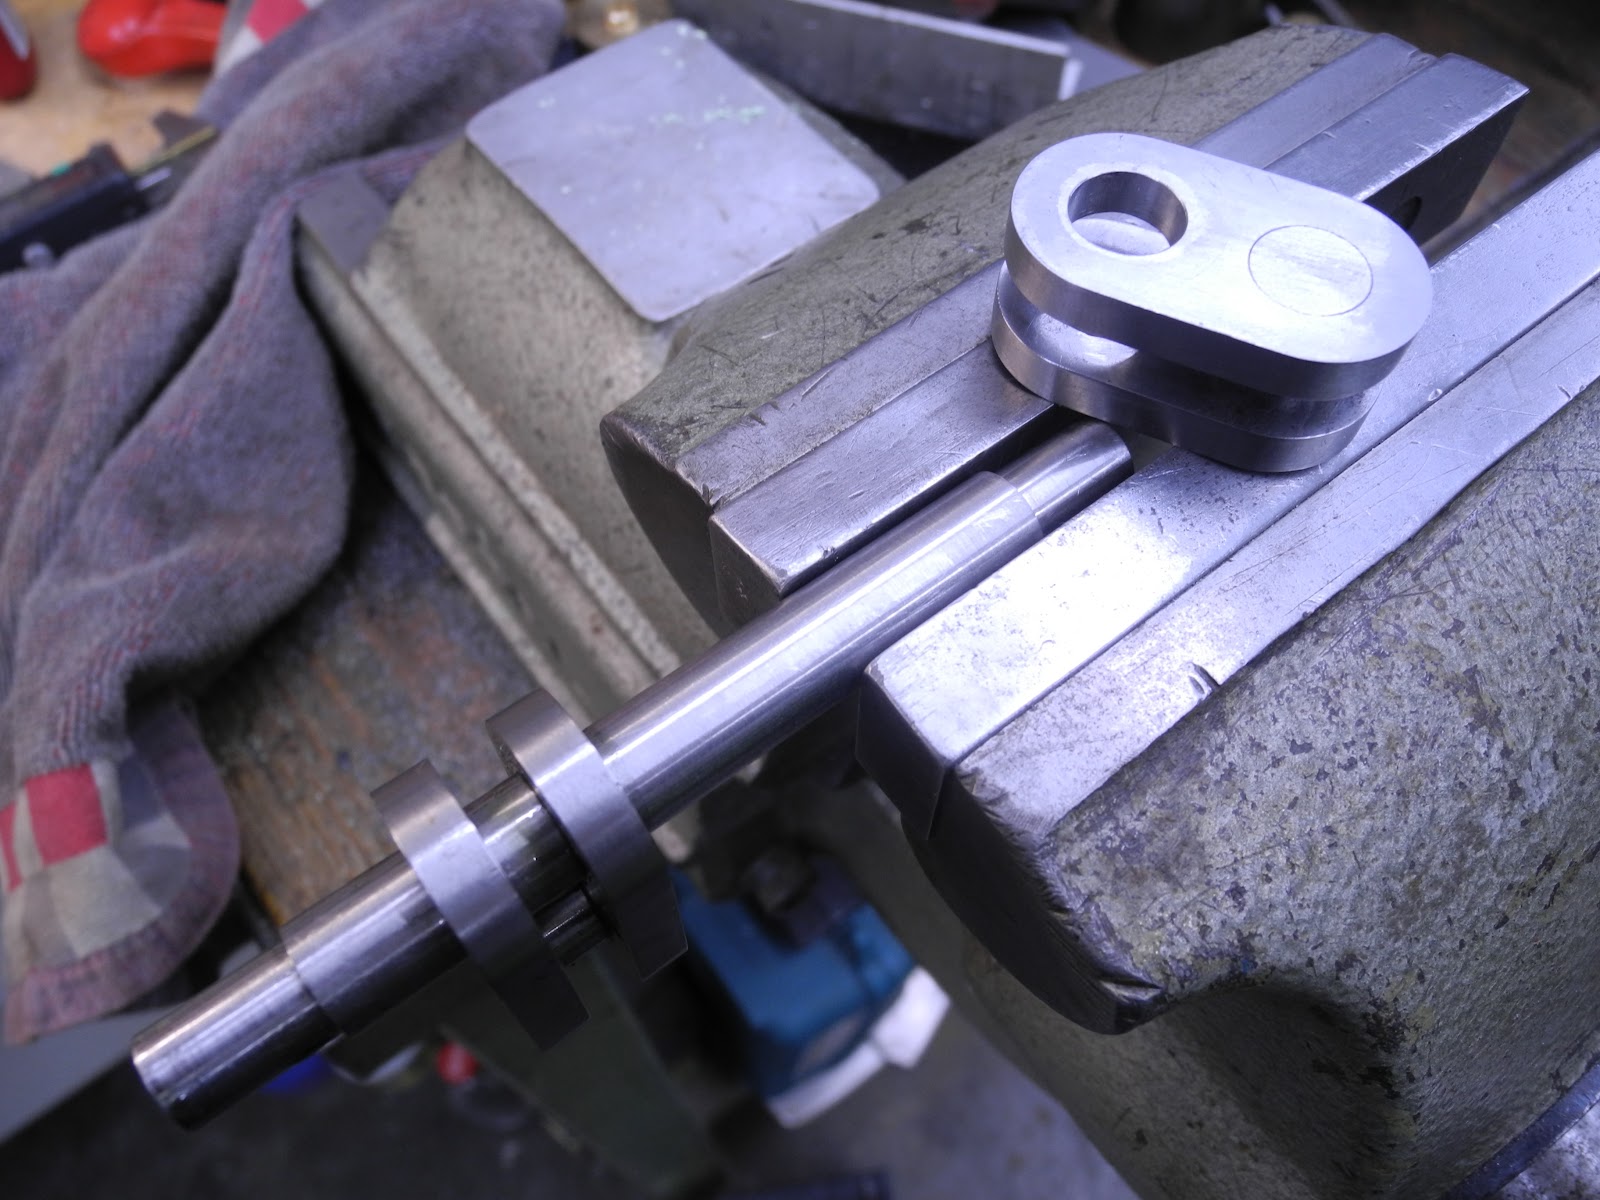
Assembling the new crank axle.
Setting cranks for glueing at 90 degrees
Setting the excenters to a calculated height (done with Solidworks drawing). Valve timing is now correct and for both cylinders the same.


New cylinder drain cocks.
Assembling the cylinder covers; no paper sealing anymore, but silicone sealant.
Assembling of the valve chest, sealed with Loctite 5926
Valve setting with the correct excenter position is an easy job.

Cleaning oil pump. The one-way clutch bearings were greased up with thick steam oil and dirt and therefore did no longer work reliably.
The oil check valve now equiped with an O-ring seating. The original brass valve seating sometimes did not seal, which led to steam mixing with oil in the lubricator itself. With this mixture (looking like mayonnaise) the pump stops working and needs to be cleaned. This is mostly done directly, while the loco is on the track and still in steam. With a syringe, the oil/water is sucked out, and with clean oil, the pump is operated by hand for several turns. The tiny pieces of dirt, that stopped the ball from seating properly on the valve seat are then usually washed away.
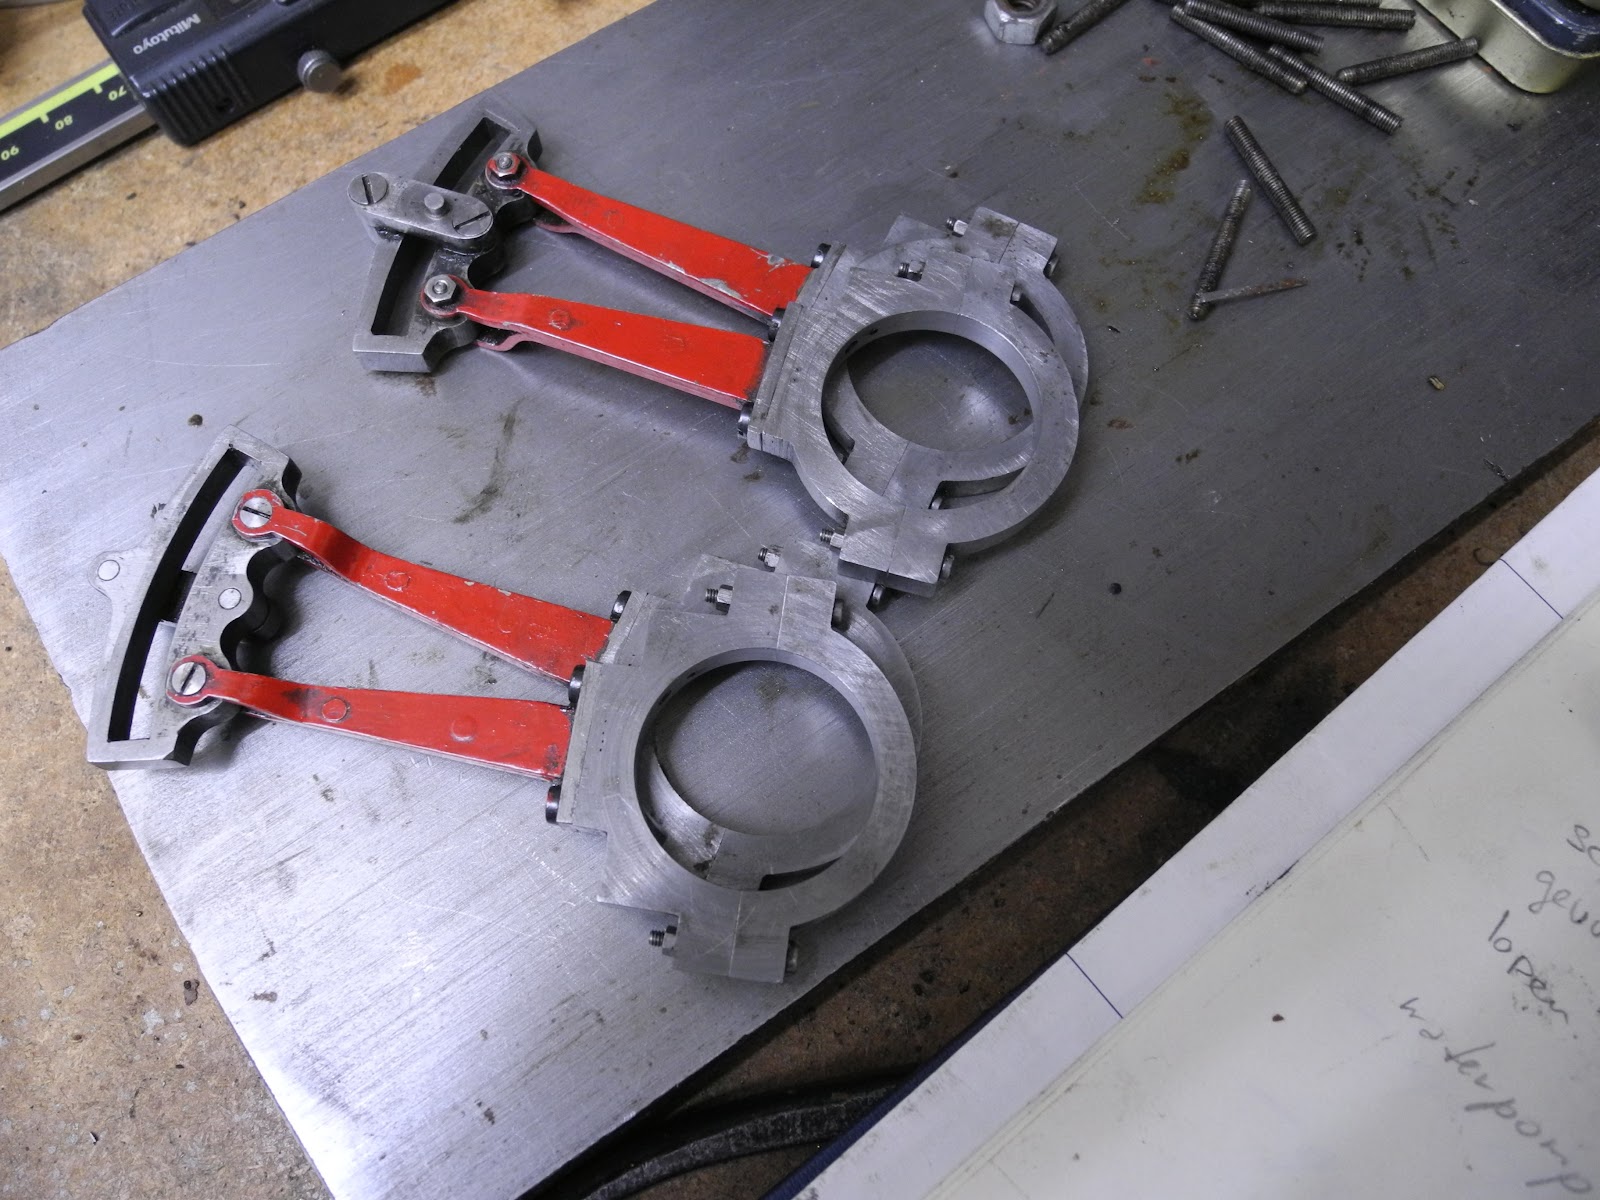
The cleaned and assembled motion work.
Retouching only some steel parts
Below the water tank, severe rust had set in, and repainting was necessary.
The safety valves needed some attention.
The valve body finally got its hexagonal shape. Now I have the equipment to do the job.
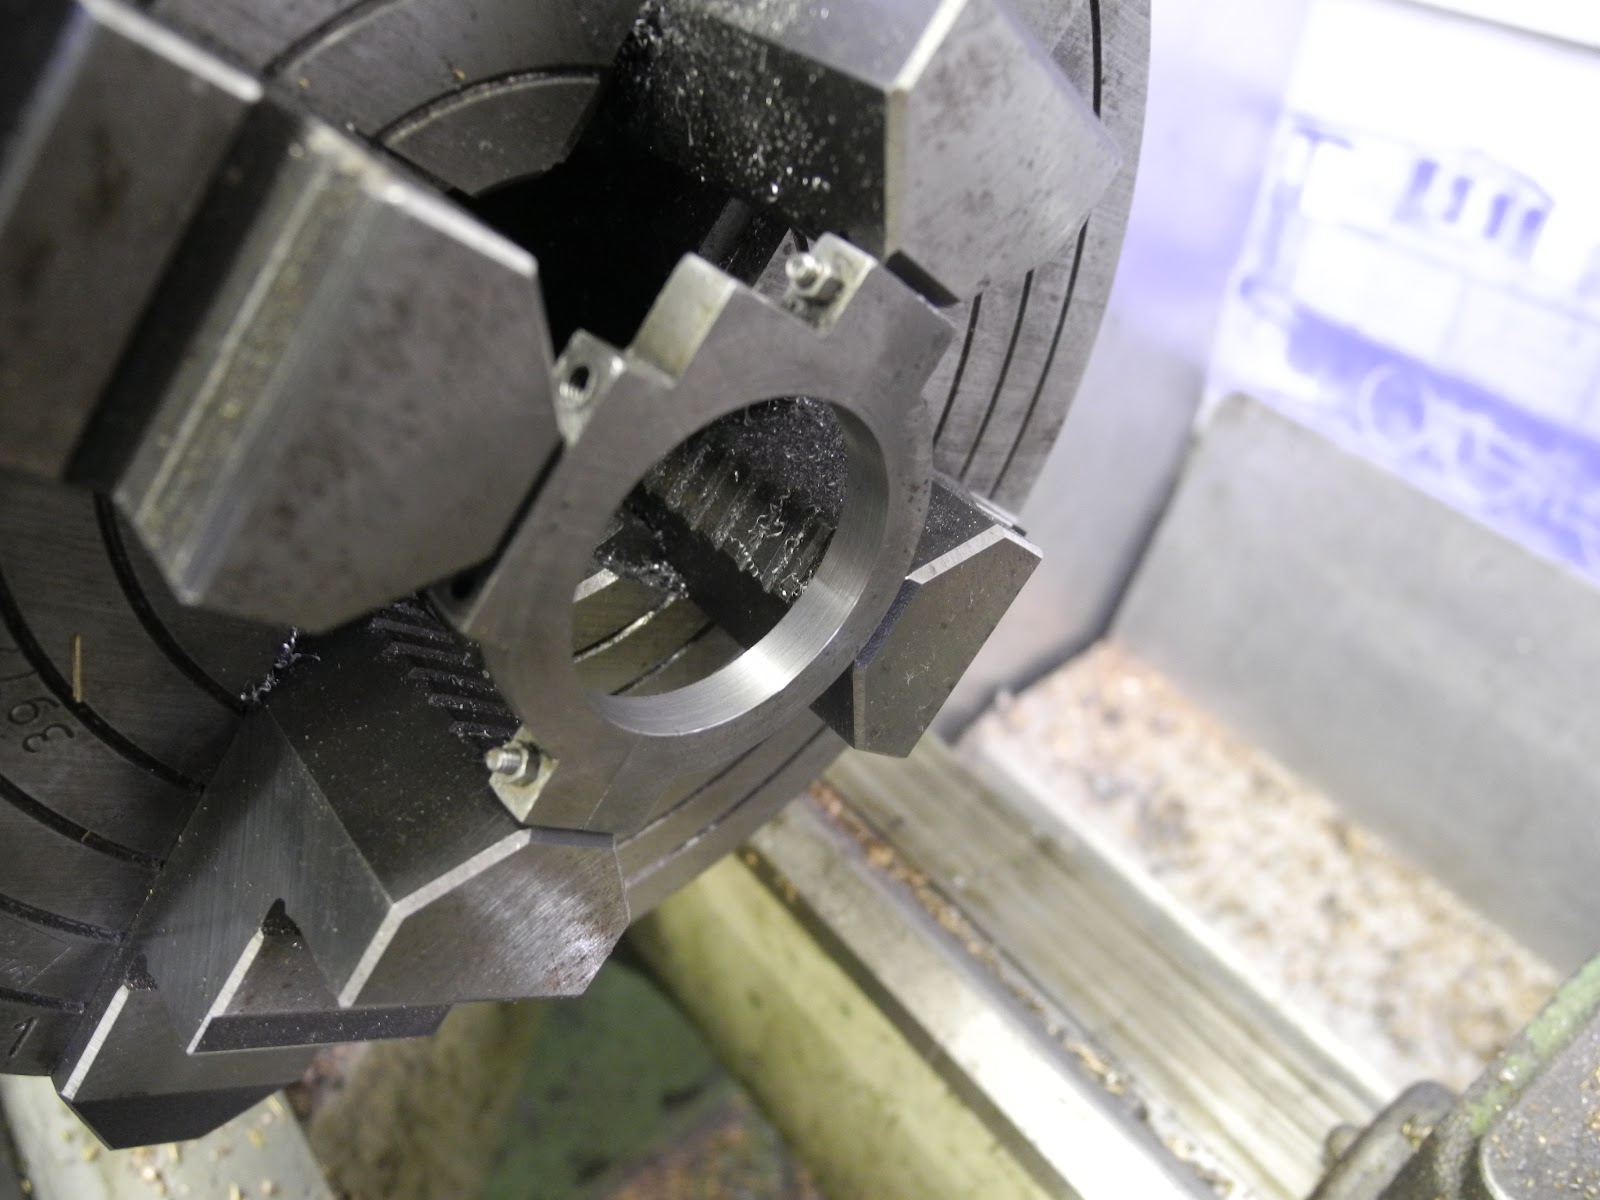
And the original locknut that I had made had 3 slots, that were too small. With a good fire and maximum pressure, they were able to keep the boiler pressure within tolerance (10% over max boiler pressure of 3 bar), but a new locknut with wider slots would be better.
The slot is cut in the lathe with a parting tool, mounted in the toolholder on its side. The main spindle is locked and the slide is moved by hand. Like a shaper, cutting only 0.05 mm per stroke.
Removing the old ones was difficult for one valve and impossible for the second. After all these years the nut seized up in the body. It was drilled in the lathe and with the special reverse tap, screwed out. I had one for years, but never used it. However, it worked fine.
Cleaned and ready for assembly

Side tanks were cleaned with citric acid, to remove the chalk deposits. Because the tanks can not be emptied, there always remains water in them after the run.
The boiler and cab are back in place. The brass work is nicely polished.
Mechanical reworked, and now running nicely with 0.5 bar compressed air.
Standing next to the new Y14 class loco. Also a Great Eastern Railway locomotive.
Back in the living room. A steam test and driving at our club track will be done as soon as the weather permits.
New air hoses. The original went missing over the years. Made from a 1 mm steel wire wound as spring in the lathe, and covered with heat-shrink tubing.