Welcome

Live steam model on 7¼" gauge of the Württembergische T3 no 924

Welcome to this blog. It will inform you about the progress of designing and building live steam model locomotives. The blog contains the description of a model Würrtembergische T3 on 7¼" gauge (built between 2006 and 2017), the wagons for this loco (built between 2018 and 2022)  and a 5" gauge model of a Great Eastern Railway Y14 class loco (started in 2020)

On the left you'll find the index where you can browse through the different articles and on the right you'll find all the extra's. On the top tabs you'll find a brief description of my other locos.


Click for the direct link to start of construction series below 
T3 7¼" steam locomotive 
 
Enjoy this site. Erik-Jan Stroetinga. The Netherlands. Europe.


Friday 31 October 2014

Starting with the pipework

Most of the pipework on the locomotive will be out of sight, but should be easy to fit and maintain. There are pipes needed to supply water from the tanks to the pumps, injector and from there into the boiler.
The connections between the side tanks were a bit of a puzzle. I had to decide in which way I wanted to assemble the locomotive. Tanks first and boiler fitted afterwards, or first the boiler on the frame and then the side tanks put in position on the running boards?


The connections between the tanks and the mechanical driven axle pump, the pipe work between the left and right tank and pipe work between bypass valves, and the injector and future steam pump were drawn (or sketched)  in Solidworks and studied on the model. 
It was decided that most of the pipe work shoud be fitted, before the boiler was on the frame. I read in the Haynes Manual that this methode was also used on the Tornado (by the way a very nice book to read).

This way I was able to fit (and access) most of the pipework, within the limited space between the frames and under the boiler, without too much trouble. The boiler is lifted in its position from the top and can than be connected to the supply pipes from the pumps and injector.


Home made connectors for the tanks were turned of brass with a M16 x 1 thread. The nut (hex. 19mm) was also made from solid brass. This design is big enough  for a 10 mm hole. The flat end pieces are screwed together and will provide the seal. This will be sufficient to prevent leakage, because there is no water pressure to take in account.


The space between the water tanks, here seen from rear to the front of the locomotive. The four connectors in place on the tanks. Only 1 mm of water will be left on the bottom of the tanks when  empty, this is due to the side ways mounting of the connectors to the tanks.


This is the double connection between the left and right tank (lying up side down in the picture).  Due to the opening in the side tanks (to make space for the weighshaft and mechanical lubricater) there is also a connection between the front and back of the tank.


A test set-up of the connecting pipes. The final soldering was done in position on the locomotive. 


This 22 mm pipe with a brass tee fitting (standard pipe fitting) contains a water filter. This can be easily removed for maintenance from the underside of the locomotive without disturbing the boiler.


Top view between the tanks. The pipes do not obstruct the weighshaft.


The pipe work is made from standard brass fittings and 12 mm copper pipe from the DIY store.


The water filters were made from fine brass gauze, soldered in between a brass ring and end cap. One filter will be for the axle pump, the other will be situated in the bottom of the left hand tank for the injector.


The filter assembly. Only three stainless steel M2 screws hold the filter in place.


The first stage completed: connections between the front and rear of the tank and between the left and right tanks. Filling water in either on the left or right tank shouldn't present any problems with water flow between the tanks. Two 12 mm pipes with a 10mm bore connect them together.  Both tanks combined hold a total of 7 litres of water.
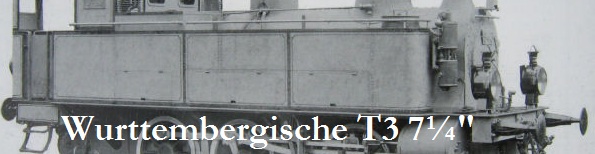
On the real locomotive there were also tanks between the frames, even though the loco had only an action radius of 24 Kilometre.  On the model these tanks are omitted.


Sunday 29 June 2014

Stroudley Regulator


The regulator is the main stop valve of the locomotive. It will control the passage of the steam to the cylinders, so that you can control the speed of the engine at any time.  A standard Stroudley type disk regulator was drawn for this loco. I find them reliable and relatively easy to make and the large dome is very suitable for this type of regulator. The range of rotation between closed and fully open is 60 degrees, which allow a gradual opening and hence good control over the driving speed.  Although this is a German locomotive, the regulator is closed, moving the regulator handle to the right and opened by moving it to the left (like most of the English locos) This was typical for the Württembergische Staatsbahnen.


The main body was milled  from a 20 thick bar. Straight forward milling job with a large end mill.
In this set-up you see the drilling of the small hole, taking up the end of the regulator rod. To get it exactly in line with the hole for the main steam pipe, a short piece of threaded rod was positioned in the vice and set to zero on the digtal read out. The body was screwed on top of it and the hole was made.


The main body with a 4 mm thick bronze disk silver soldered to it. Two holes of 5.5 mm are used for taking of the steam from the boiler when the regulator is fully opened. 


Stainless steel operating links of 3 mm thickness and 8 mm width. M4 stainless steel bolds were made to keep it in place.


It just fits in the dome. 


The main steam pipe is 12 mm round bronze, but has a 7 square hole. This was filed by hand, for taking up a piece of square steel.


This piece of steel can be used as a wrench to screw in the steam pipe in to the regulator body. This was designed this way, so that removing in the future for maintenance should be possible. Alan Beard from Bedford ME told me that he had trouble removing the steam pipe from his 7¼ Marie Estelle 0-4-0 loco after 25 years of service. This was the more often used  copper pipe arrangement (the same with my 3½" and 5" locos), which only has a small slot at the end of the pipe. A large screw driver should do the trick of removing it, but over the years it will be chalked up a bit, and more force will be needed. 


The set up in the boiler. A small piece of wire, bend in a hook, is used to catch regulator rod to position it for the square hole


The bottom part of the linkage; a piece of 1 mm stainless steel wire will secure the bold from working loose in service; which really would present a problem: How to retrieve the small bolds from the boiler.


A cloth is used to close the boiler; so no parts are accidently dropped in the boiler.


The last piece of wire in position. The V-shaped holes in the disk can be clearly seen: this way there is a gradual opening of the steam ports. A nice controlled and slow start of the locomotive should be possible.


The end stops of the regulator are on the boiler back head in the cab.


Sunday 4 May 2014

Brake gear


The brake system consists of several parts: brake hangers, brake blocks, hanger brackets, cross rods, pull rods and a brake lever in the cab. It's a rather simple affair because the real locomotive was designed as branch line loco derived from a Prussian Class T3 of the year 1882. So no high tech compensation system or even steam brakes. All was hand operated but the set-up off the lever mechanism in the cab was done in such a way that the maximum brake power never exceeded the adhesion force of the loco; an early type of  anti-lock brake system (ABS) 


I first started with designing the brake system in Solidworks. These drawings provided the data for the CAM-system which in turn generated the CNC-code for my milling machine.


This was one of the first programs I made for my new milling machine but it took more than a year before it came to production...........as always several other parts of the loco were made first and took more time than originally planned.


The production of one evening.


For bending the brake hangers a simple tool was made. A locating pin made sure that all the bends were at the same location.


The bending was done in one go; these photos show the 2 mm offset


The vice, complete closed.


Two hangers together. The locating pin in the bending tool is visible. The two parts are silvered soldered. cleaning up (by hand) after soldering took more time than making the parts.


The brake blocks were made from mild steel. With the boring head in the milling machine set to the wheel radius, and set-up under an angle of 3 degrees (wheel profile), the first shape is cut.


The finished wheel profile against a fixture, so that the holes for fixing the blocks in the hangers could be drilled.


After milling a recess the next step is made in the fabrication of the four blocks. Although the loco has 6 wheels only the last four are braked.


The boring head is set to a different radius so the shape of the block could be cut.


This was done at both sides of the material.


Half way there.


The CNC milling machine is used again to cut the outer profile of the brake blocks.


The last millimetre was cut by hand. This method made it possible to get a sturdy set up in the milling machine and use the drilled holes as an easy 'zero-point' for the CNC program.


The complete blocks and hangers on a real brake shoe of a German steam locomotive (Baureihe 23).


 The four blocks with the locking pin. On the right you see the first test part of the CNC-program milled in plastic. This was done when my CNC-milling machine was just finished in February 2013.


The hanger brackets were milled from a solid piece of mild steel. 


For easy set up in the vice two hangers are made side by side. 


The radius was made the old fashion way: with filing buttons which were used as a guide for filing the radius by hand. This could be done by CNC, but because there are only two parts it's quicker by hand.


A test fitting for the front hangers.


For the brake lever in the cab I had only a few photos I've made in the museum to work from. It consist a toothed ratchet system. The ratchet was cut with a dove tail cutter and dividing head.


                                  Brake on position.                                                           Brake off position.

A 30mm square tube was cut in half and silver soldered to a base plate. The lever with contra weight will operate the pull rod.


The ratchet system with catch pawl


The complete set up in the rear of the cab (which is dismantled).


The brake hangers in position on the chassis.


The cross pull rods were build up from two end pieces and a strip in the middle.


In these holes the pulling rods will be mounted. There are no compensation levers, only simple threaded pulling rods


A completed cross rod.


The last part; the brake shaft which connects the pulling rods with the cab brake lever.


The locomotive on 23 March 2014, at our annual model engineering exhibition at Loon op Zand: 
with the brakes fully applied!